Getting Started
Set up your account and start uploading your astrophotography data
DeepSkyLog offers multiple ways to upload your astrophotography data. Choose the method that fits your workflow: the NINA Plugin for real-time uploads during imaging sessions, or the DeepSkyLog Sync desktop app for batch-syncing existing files from your hard drive.
Step 1: Create Your Account
- Visit app.deepskylog.space and create your account
- Verify your email address and log in
- Set up your first Location (e.g., your backyard, remote site)
- Create an Equipment profile - combine your telescope, camera, and filters into a named setup
These Location and Equipment profiles will appear in both the NINA Plugin and the desktop app once you sign in.
Step 2: Choose Your Upload Method
Option A: NINA Plugin (Real-Time Upload)
The NINA plugin uploads frame metadata automatically as you capture, so your session data appears in DeepSkyLog in real time.
Installation:
- Open NINA and go to Plugins (gear icon in the left sidebar)
- Switch to the Available tab and search for DeepSkyLog
- Click Install, then restart NINA
- After restart, find DeepSkyLog under the Installed plugins list
Configuration:

- Toggle Plugin Enabled to ON
- Click the Account link to sign in with your DeepSkyLog credentials
- Select your Location from the dropdown (these are the locations you created in the web app)
- Select your Equipment profile from the dropdown
- Optionally enable Allow SNAPSHOTs if you want single test frames to be uploaded too
- Click Refresh if your locations or equipment profiles were recently updated
Once configured, every frame captured during your NINA sequence will have its metadata automatically sent to DeepSkyLog. The following data is uploaded:
- Image Details: File path, filter, exposure time, binning, and camera temperature
- Quality Metrics: Mean and median ADU, detected stars, HFR, FWHM, and eccentricity
- Guiding & Focusing: Guiding RMS, focuser position, rotator angle, and pier side
- Weather Conditions: Temperature, humidity, wind speed, cloud cover, and sky quality
For troubleshooting and advanced settings, see the NINA Integration guide.
Option B: DeepSkyLog Sync Desktop App (Batch Upload)
DeepSkyLog Sync is a standalone Windows application for uploading existing FITS files from your hard drive. It is ideal for importing historical data or syncing files captured with software other than NINA (e.g., AsiAir, SGPro, APT).
Download DeepSkyLog Sync for WindowsInstallation and sign in:
- Run the installer and launch DeepSkyLog Sync
- Go to the Settings tab and sign in with your DeepSkyLog account

In Settings, you can also configure:
- Calculate star metrics - enable this to compute HFR, star count, and eccentricity locally before upload. This is especially useful for files from AsiAir or other software that does not include these values in FITS headers. Note: this makes syncing slower.
- Monitor folder for new images - enable this to watch a folder and automatically sync new files as they appear, turning the app into a real-time uploader.
Syncing images:

- Switch to the Sync Images tab
- Click Select Folder and pick the directory containing your FITS files (e.g.,
Z:\2025-02-05) - The app scans the folder and lists all found frames with their metadata: target name, HFR, star count, eccentricity, HFR standard deviation, and exposure time
- At the bottom, select the Location and Equipment profile to associate with the upload
- Use Select All / Deselect All or pick individual files
- Click Sync Selected to upload
Option C: Batch Upload CLI (Cross-Platform)
The Batch Upload CLI is a single, standalone command-line tool for Windows, Linux, and macOS. It is ideal for scripting, scheduled syncs, and uploading from headless machines or network storage (NAS). No installation is required - just download the binary for your platform and run it.
First-time setup:
On Linux and macOS, make the file executable first, then run it with no arguments to launch the setup wizard:
chmod +x batch-upload-v1.0.0-linux-amd64
./batch-upload-v1.0.0-linux-amd64
On Windows, open a terminal in the download folder and run:
.\batch-upload-v1.0.0-windows-amd64.exe
The setup wizard runs once and walks you through:
- Authentication - a browser window opens for you to sign in to DeepSkyLog
- Default Location - pick the observing location to associate with uploads
- Default Equipment - pick the equipment profile to associate with uploads
Your settings are saved to ~/.batch-upload/config.json, so you only do this once. Run with -reset any time to
go through the wizard again.
Uploading frames:
Point the tool at a folder of FITS files with -dir:
batch-upload -dir "/path/to/your/fits"
It scans the folder, reads each frame’s metadata, and uploads it using your default location and equipment.
Useful options:
| Option | Description |
|---|---|
-dir <path> | Folder(s) to scan for FITS files (comma-separated, supports glob patterns) |
-tui | Launch an interactive terminal UI to review and select frames before uploading |
-location-name <name> | Override the default location for this run |
-equipment-name <name> | Override the default equipment for this run |
-list-locations | List your locations and exit |
-list-equipment | List your equipment profiles and exit |
-metadata-dir <path> | Folder with NINA ImageMetaData*.json / WeatherData*.json sidecar files |
-network-optimized | Tune reads for network storage (SMB/NFS) |
-reset | Re-run the setup wizard |
-version | Show the version and exit |
Tip: Because it’s a single binary with no dependencies, the CLI is ideal for a scheduled task (cron / Task Scheduler) that syncs a capture folder automatically.
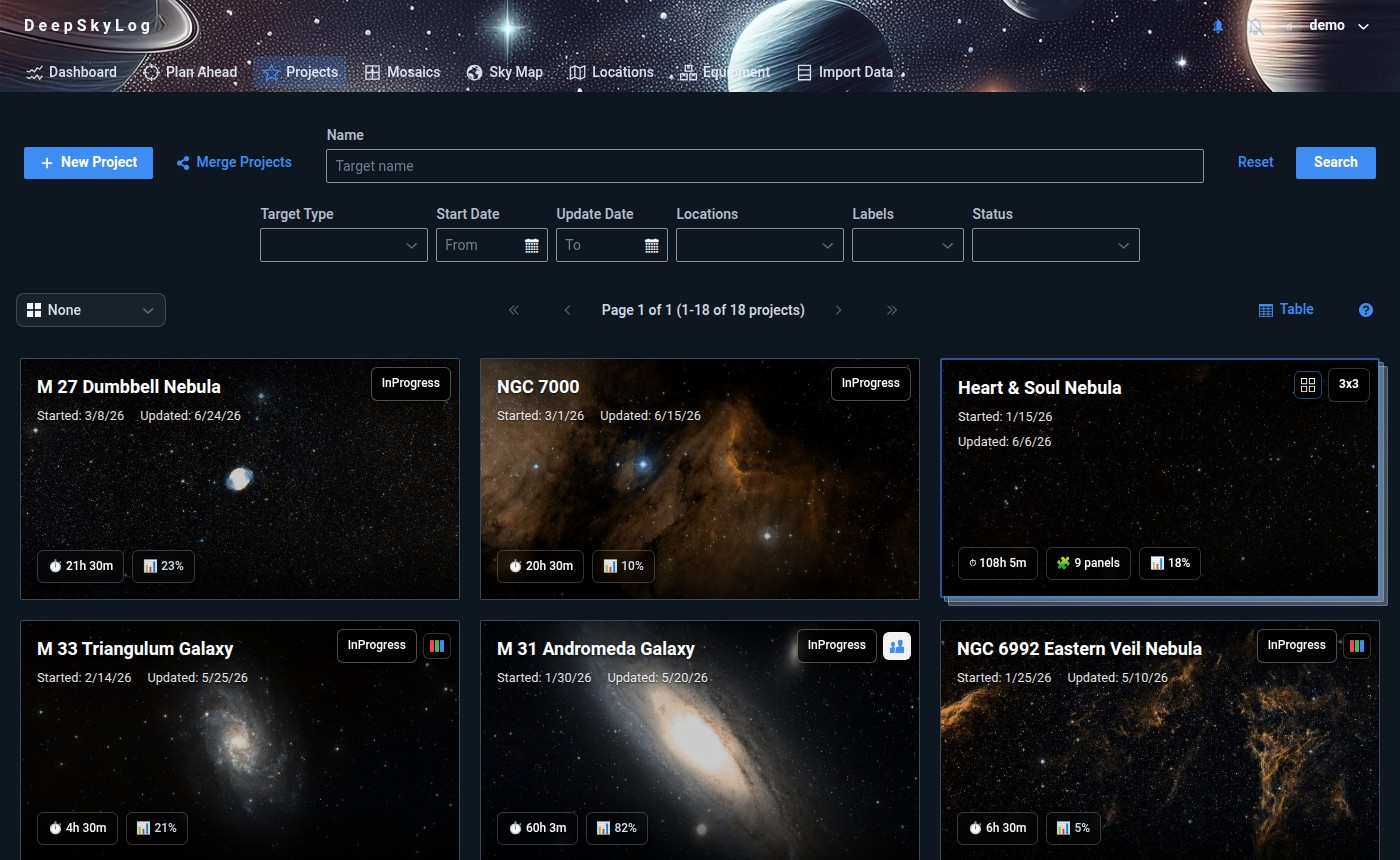
Step 3: Projects Are Created Automatically
You don’t need to create projects manually. When frames are uploaded via the NINA Plugin or DeepSkyLog Sync, projects are created automatically based on the target name in the FITS metadata. The location and equipment you selected in the plugin or desktop app are assigned to each project as well.
Once a project exists, any future frames with the same target name are added to it automatically.
Head to the web app to review your projects and optionally set filter goals (e.g., 10 hours of Ha, 5 hours of OIII) to track your imaging progress.
Step 4: Explore Your Data
With frames uploaded and projects set up, you can now:
- View dashboards with integration time, session history, and progress toward goals
- Use the Sky Map (powered by Aladin) to visualize frame coverage and mosaic layouts
- Analyze quality metrics - track HFR trends, guiding performance
- Collaborate - share projects with team members and track contributions
Tips
- Use consistent target names across NINA and the desktop app for automatic project matching
- Check the HFR and eccentricity stats to identify subpar frames before you start processing
- Set filter goals on your projects to see exactly how much integration time you still need
Need Help?
- FAQ - common questions and answers
- Email Support - direct support